Quick-Start Guide to Creating Views
This page provides a high-level guide to building kdb Insights Enterprise Views.
The steps to building Views are listed below.
Create database and pipeline
Before you can build your Views you must create and deploy a database to store data and a pipeline to import data into the database. You can then add this data to components on your view.
Create a View
To create a view:
-
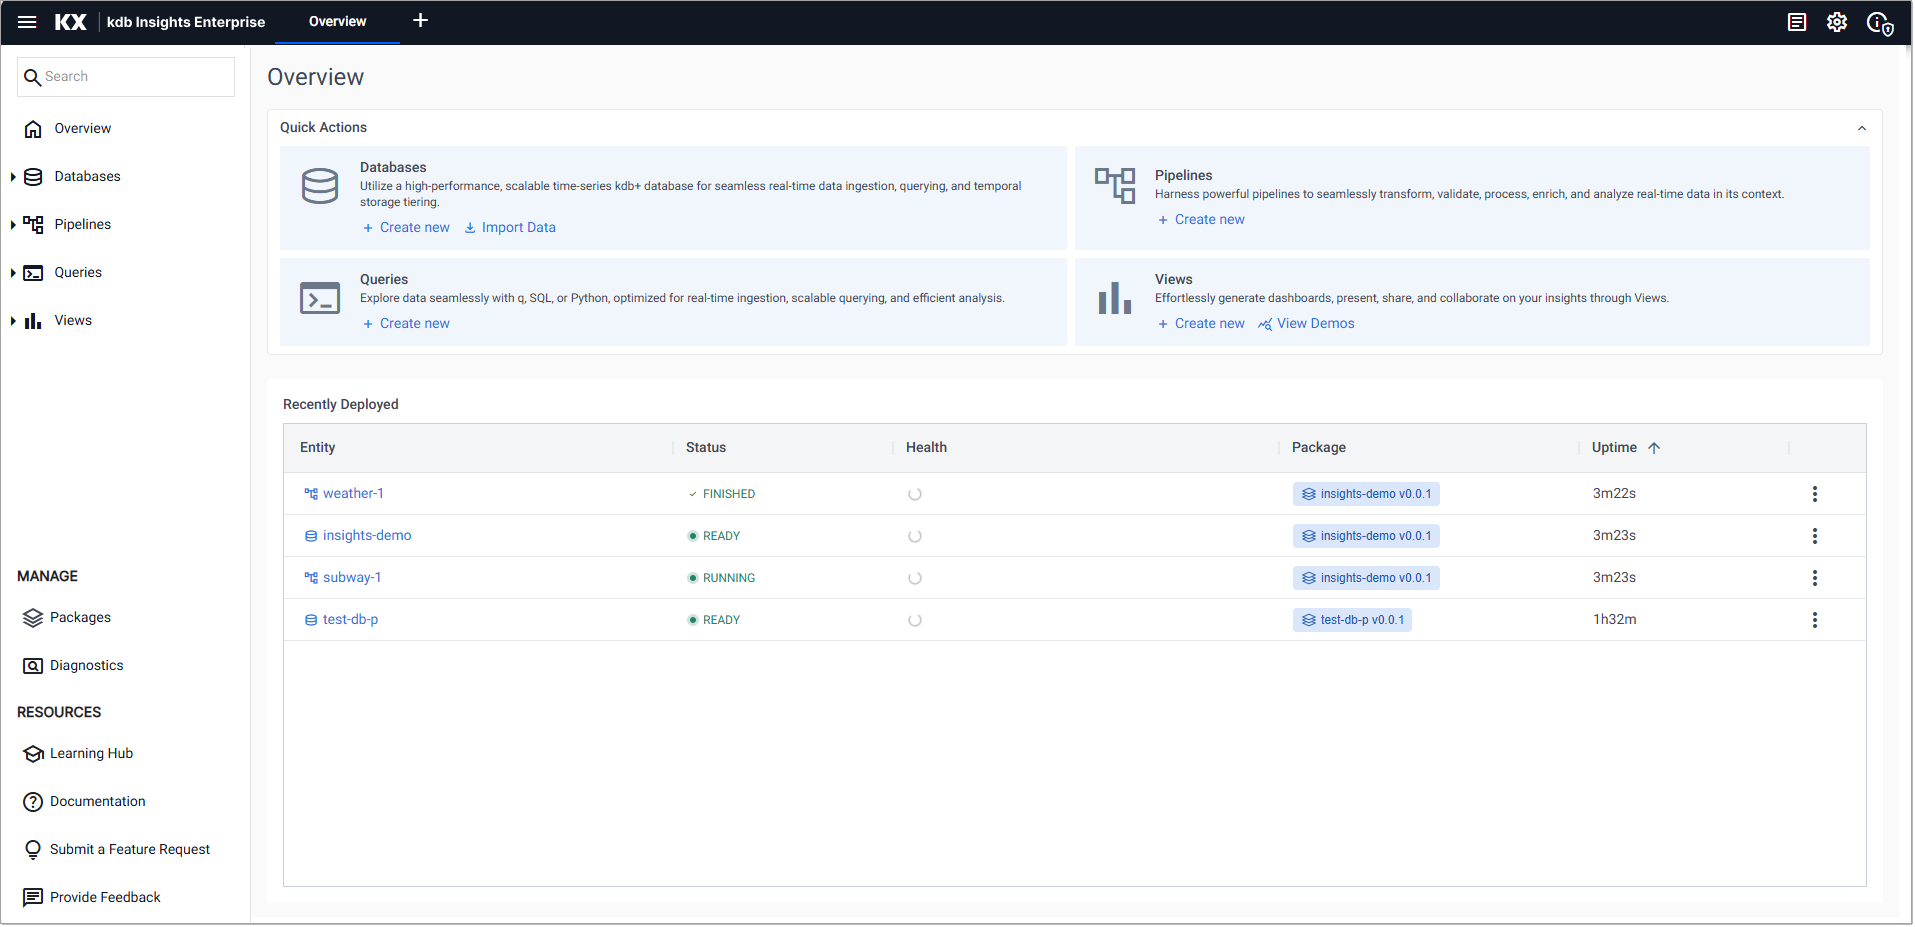
On the Overview page in the Views tab click Create New , or use one of the other methods described here.
In the Create View dialog, enter a name for the view, select the package it belongs to, and optionally add Tags.

Add and configure a component
-
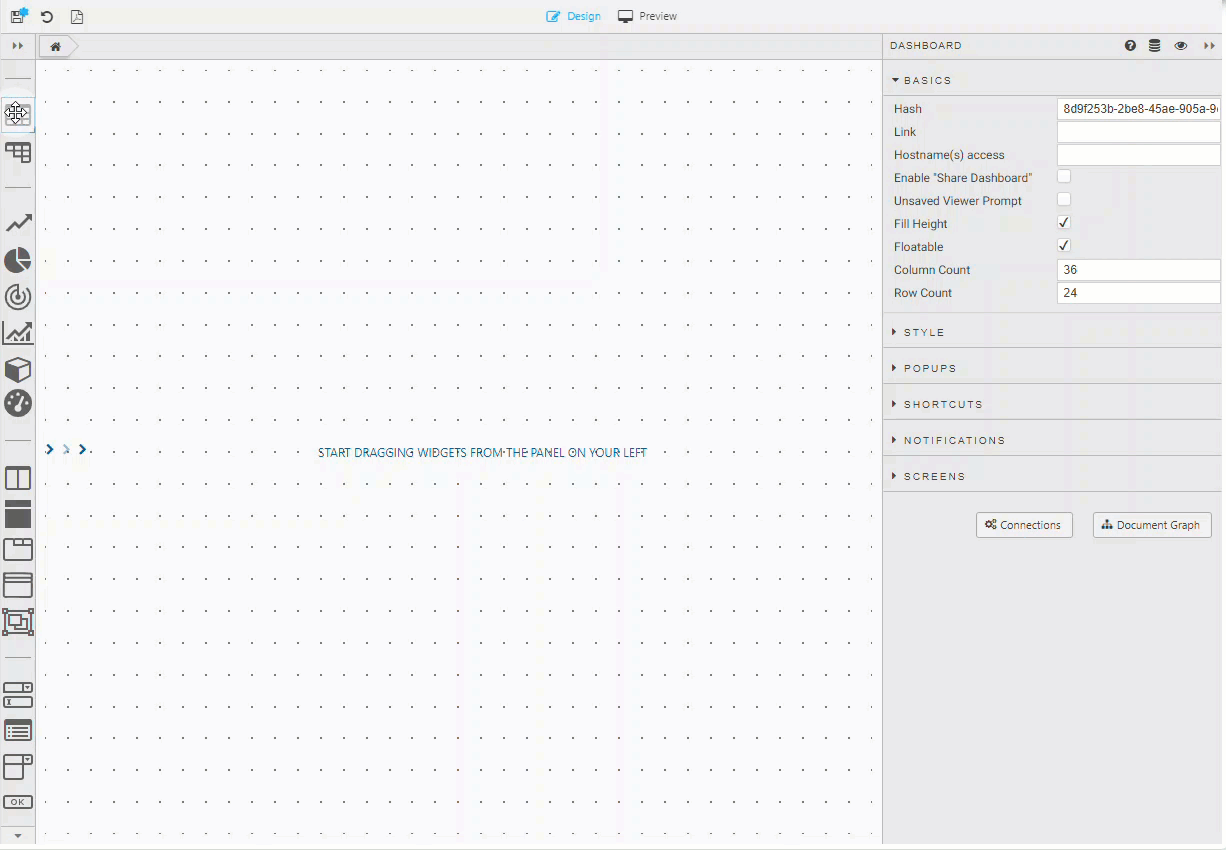
Click and drag a component from the list of icons on the left of the workspace, into the center as shown in the following animation. The first component, Data Grid, is a good one to start with.
-
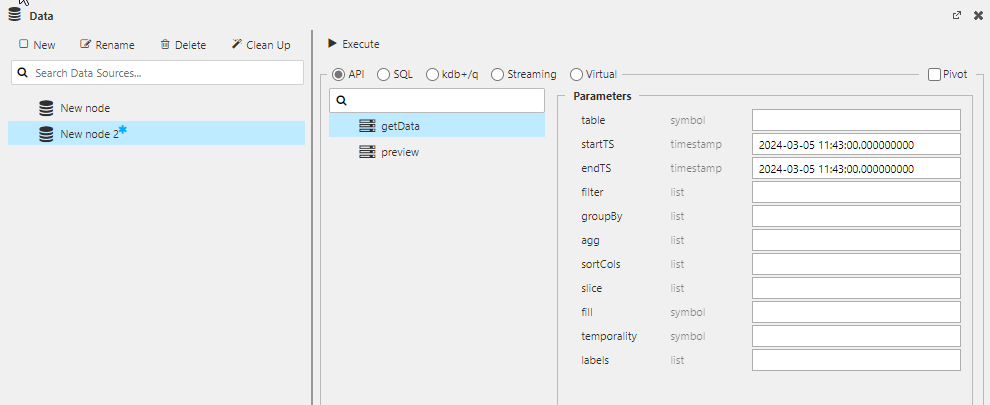
Open the Data editor by clicking Click to populate Data Source inside the selected component.
-
Click New to add a new data source.
-
If you are new to kdb Insights Enterprise, we recommend starting with the getData API query to get the data, so click the API radio button.
Format the components data
You can format the data inside the component; adding colors, highlight rules, actions and/or filters.
Read the the guided walkthrough on building Views for more details.
Add more components
You can continue to build the view by adding more components and data queries.
Read more about the full set of components here.
Preview a View
Once you have designed your view, you can interact with it in the preview panel.
Click Preview at the top of the workspace. Preview Mode enables you to test the dashboard with the end-user level of interactivity.
Save and share
Once your view is configured you can save it and share the URL link with friends and colleagues. Click on the triple dot menu beside a View and click Share.
Click here for further details on saving and sharing views